

How To Attach A Decorative Cupola To A Metal Roof

How to peak off your roof with spires, finials, domes and cupolas
Spires, finials, domes and cupolas can give a building a sense of culturally significant design. When correctly installed, buildings are enhanced and remain beautiful for years to come up.
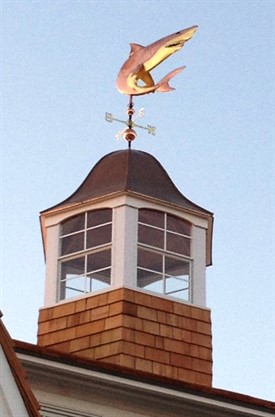 |
| Photo courtesy of Westward Coast Weather Vanes |
Cupolas
A cupola is a highly ornamental, accenting construction mounted on top of buildings and usually centered in a prominent position along a roof ridge line. The discussion cupola ways "small cupo" or piffling dome. Unremarkably made of vinyl, copper or wood, they come in one piece (or if larger) two or three pieces. Multiple-slice cupolas make handling and lifting easier. While some cupolas are simply decorative, others are functional. Functional cupolas provide ventilation to buildings by allowing moist air a place to escape. A decorative cupola differs from a functional cupola in that the roofing material and roof sheathing do not need to exist cutting away to create a vent hole.
Weather vanes are traditionally located at the peak of the cupola in a prominent location. Most cupolas have internal access (for ventilation or maintenance purposes) and a cantankerous brace as a structural back up onto which the spire (vertical installation rod) tin be mounted using a cupola flange. Correctly cut out the cupola base of operations measurement angle to fit on the roof is important. To do this, make up one's mind the roof slope. Ane manner to practice this is with an bending finder. When placed on a roof, it volition betoken the slope of the roof in degrees; a 4:12 roof for example would have a slope angle of xv degrees. Brand sure the angle finder rests squarely on a shingle if y'all have a shingled roof, and not across layers of shingle rows. Record the roof pitch angle and gear up to cut the cupola'due south base components to fit the roof.
Some other manner to determine the roof gradient is to cut and remove the ridge cap where the cupola will be installed. Take two 1x4-inch boards, ii strips of paper-thin or two rulers, and fix them, on edge, straddling downwardly opposite sides of the roof ridge. Center them against the peak center of the roof. Hold them tightly together at the height and carefully lift them to maintain the roof slope angle. Doing this will provide an accurate and symmetrical cutout template of the roof slope bending.
Again, the cupola base must match this roof slope angle. Transfer this bending to both sides of the cupola by tracing with a center line the angle formed under the wood/strips/rulers. Cut the cupola along your marked line starting cuts at the corners and ending at the center. Many cupolas come with molded, standard three:12, 4:12 and 5:12 pitch lines on them. Steep roofs with a greater than 9:12 slope may need to take an extended base of operations installed. Measure and clearly mark where the middle of the cupola will exist located. Don't place the cupola over a supporting rafter.
Decorative cupolas can be installed with screws on four, predrilled 2x4-inch forest mounting blocks with some covering cement and silicone caulk nether the blocks. Set the cupola in place on the roof. Information technology should be snugly fastened into the sides of the mounting blocks with ii to three stainless steel screws. Plug or patch the screw holes, and caulk where the base and roof meet on the angle sides.
For functional cupolas, cut the appropriate size hole centered at the marked cupola location. Center the cupola over the hole, drill pilot holes (if desired) and spike it using fasteners⎯most manufacturers recommend four per side. Prior to installation, run a thick dewdrop of white caulking on the underside of the base of operations to enhance the seal. Installing metal or aluminum flashing is also recommended 12 inches on each cupola side to prevent leaks. Stop the ridgeline with roof caps that fit tight confronting the cupola'southward sides.
 |
| Photo courtesy of CopperCraft |
Spires and Finials
A finial is an element marking the tiptop or end of some object, emphasizing the apex of a dome, spire, belfry, roof, gable or any other distinctive ornament at the top, end or corner of a edifice or structure. Spire and finial installation frequently depends on their size. Often, their installation method is dependent upon the individual site conditions and customer preference. In almost cases, they arrive at job sites delivered in sections, except for one-piece units, ready to exist installed with the roof slope angle already provided. Bolts are usually provided to gather the diverse components, but installers unremarkably provide the connections that anchor the base unit to the roof.
Finials are available with or without a roof cap. A roof cap (or roof mount) will hold the finial. Without a roof cap, drill 3/iv of an inch into the roof pinnacle to agree the finial's bottom. For ridge, hip and multi-sided applications, virtually spires have foursquare bases. For turret applications, spires come standard with round bases.
"A smaller spire or finial can be installed with stainless steel screws after making sure it is straight and level," says Guenther Huber-Delle, president of CopperWorks Corp., Decatur, Ala. "The larger ones should always accept an 'under construction'⎯a stainless steel post (circular or foursquare) depending on [the ornamentation'south] size and shape⎯which needs to be mounted on the roof rafters with screws. Check that information technology is level; the finial/ spire could slide over the postal service."
Ginny Bruce, inside sales rep at CopperCraft, Grapevine, Texas, explains the installation this way: "On spires the mounting brackets or mounting band screws directly to the substrate. Then the spire is slipped over the mounting bracket, and either popular riveted or screwed to the bracket. Some applications come with a mounting rod fastened to the spire that extends 6 to 12 inches past the bottom of the spire. The contractor will follow the same steps with the mounting subclass and fasten the nut from the underside of the spire for attachment. The mounting rod is dependent on the spire size."
 |
| Photo courtesy of CopperWorks Corp. |
Domes
Hemispheric domes add a dramatic look to any edifice. They are curved structures with no angles or corners that enclose a lot of space without supporting columns. Most are self supporting because of their design. Because of this, most are considered freestanding with no requirement of any superstructure for their erection.
Dome installation is commonly washed from its inside directly onto the structure. There are many anchoring and/or attachment systems bachelor to run into their numerous design applications. Many merely have commodities or spiral-attached flanges where the dome sits on the structure. Depending on the diameter, the geographic and concrete locations, reinforcing kits are available. They "hug" the within wall of the dome and can be applied without detracting from the dome's aesthetics.
Only unlike cupolas, domes have different installation requirements because yous tin can't cutting the roof pitch into them. "They have a flat surface," says D. Gale Graf, owner and president of CFBS Inc., Anderson, S.C. "You will not always have a flat surface to install on with a standing seam metal roof."
Upwards in the Air
These ornamental products must be raised to the roof to install them. "Virtually spires/finials can be carried past manus onto the roof," Bruce says. "For larger items such equally cupolas or chimney pots, these items will need to be lifted onto the roof using a forklift or small crane. All of our CopperCraft products come packed in plywood boxes with bottoms to assist in lifting. There will too exist a lifting lug provided with the unit of measurement."
Oftentimes cranes are the only way to hoist the product. "The size and reach of the crane volition depend on the size of the product and the size of the building," Graf says. "You demand to know how to lift the product or you can destroy it. We want the crane to have a reach significant enough so when it pulls up along side of the edifice, the product doesn't bang into information technology."
Graf likes to transport his domes in 1 piece; that manner they can be lifted from their top. But he explains: "It depends on the nature of the dome. It depends on if there is another section that sits on top of the dome. Either they claw on the edges with straps, or they can cablevision information technology and lift it from the centre of the dome if there is an opening in the dome. The domes are structurally strong enough to practice that." With spires, Graf cautions not to lift them from their tip because this is usually the weakest point and is not congenital to serve as a hoist point. Be sure to apply wrap straps. Too, Huber-Delle advises to e'er adhere to OSHA regulations.
 |
| Photo courtesy of West Coast Atmospheric condition Vanes |
Up to the Installer
These ornamental roof products are designed to be installed by any competent architect, installer or contractor. Always follow manufacturers' instructions and manufacture standards when installing. Notwithstanding, Graf cautions that considering of liability today, manufacturers are reluctant to put a lot of teaching in writing. Also, "We don't make whatever money installing and it'due south a higher risk," he says. "Nosotros prefer having our customers install themselves, only, I'll requite customers as much fourth dimension as they need on the phone. I'll go to sites sometimes and talk them through it, depending on the size of the projection."
Because every building is unlike, exact installation techniques volition vary. "There is no installation rule book that exists that includes every shape and size of ornaments," says Huber- Delle. "It must always be upward to the builder/ engineer/installer, who volition be in the finish, responsible for it. The mounting of any ornamental slice is up to the installer and if he is non comfy, he should always get an stance from the engineer. There are new inventions and developments every solar day for the tools for the installation of ornaments. However, the traditional methods always work. The OSHA regulations are also constantly changing."
Bruce advises to consider the mounting y'all will need prior to the construction start date to ensure the simplest, virtually secure method.
 |
| Photograph courtesy of Copperworks Corp. |
Source: https://www.metalconstructionnews.com/articles/decoration-installation
Posted by: feathersairming.blogspot.com
0 Response to "How To Attach A Decorative Cupola To A Metal Roof"
Post a Comment